
BMW E30 318is Gauge Cluster and How to Change Its Light Bulbs
The BMW E30 318is is a beloved model within the iconic E30 range, revered for its lightweight design, responsive handling, and the fun-to-drive M42 1.8-liter engine. One aspect of the car that has gained both nostalgia and functionality is its gauge cluster, which provides critical information like speed, RPM, fuel levels, and engine temperature. Over time, however, the gauge cluster’s light bulbs may dim or burn out, making it harder to read vital information, especially during night driving.
In this article, we’ll explore the BMW E30 318is gauge cluster in more detail and provide a step-by-step guide on how to change its light bulbs. Whether you’re restoring your E30 or simply maintaining it, this task is a crucial part of ensuring your classic BMW’s functionality and safety.
Overview of the BMW E30 318is Gauge Cluster
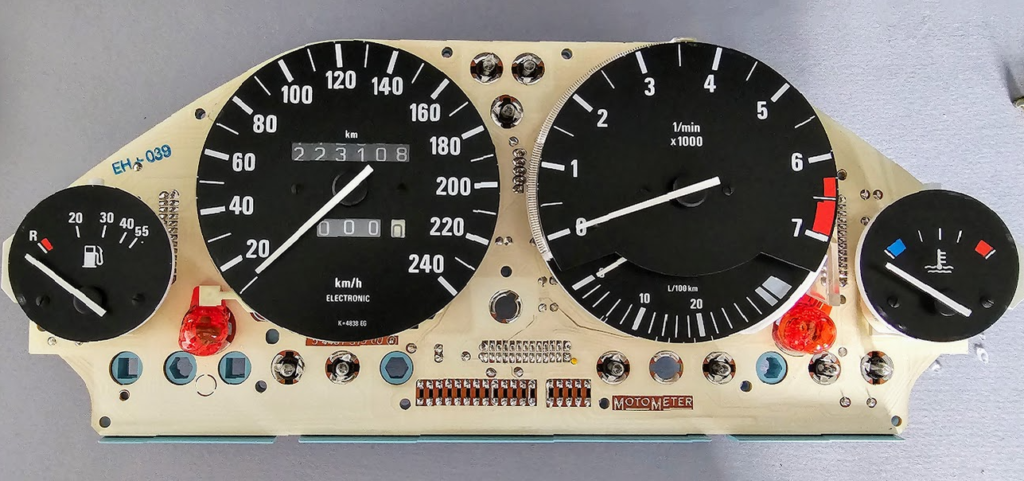
The E30 318is features a classic, driver-centric gauge cluster that houses analog dials for speed (speedometer), engine RPM (tachometer), fuel level, and coolant temperature. There are also warning lights for important systems such as oil pressure, battery, and brake status. The overall layout is simple yet effective, reflecting the precision engineering BMW is known for.
As with most older cars, the gauge cluster is illuminated by small incandescent bulbs. These bulbs, located behind the cluster, allow you to view the dials in low-light or nighttime conditions. Unfortunately, after years of use, these bulbs can burn out or grow dim, making it hard to read the instruments.
Replacing the bulbs is a relatively straightforward process but requires some care to avoid damaging the delicate parts of the dash and gauge cluster.
Tools and Parts Needed
Before starting, ensure you have the following tools and parts on hand:
Tools
- Phillips screwdriver
- Flathead screwdriver
- A small socket wrench set (optional)
- Plastic trim removal tools (optional but recommended to avoid damaging trim)
Parts
- Replacement bulbs (typically T5 or T10 bulbs, depending on the cluster setup)
- New LED bulbs (optional, if you prefer brighter, longer-lasting illumination)
- Electrical contact cleaner (optional, for cleaning connectors)
Step-by-Step Guide
1. Disconnect the Battery
Before working with any electrical components, it’s crucial to disconnect the car battery to prevent accidental shorts or electrical issues. Simply disconnect the negative terminal on the battery.
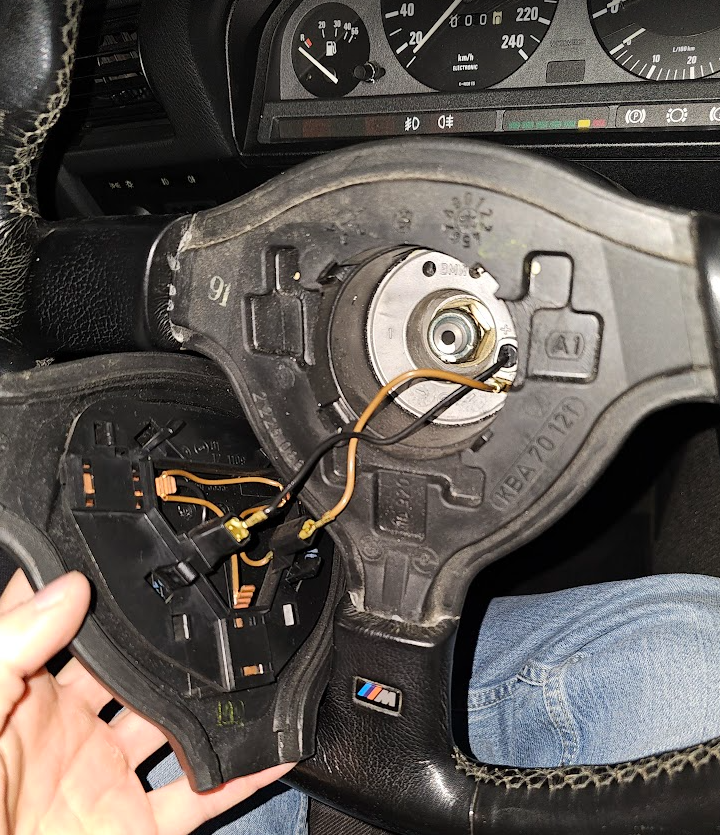
2. Remove the Steering Wheel (Optional but Recommended)
- Why: Removing the steering wheel makes it much easier to access and remove the gauge cluster. Some owners prefer to leave it on, but for first-timers, removing the steering wheel offers more room to work.
- How: Use a socket wrench to remove the center bolt holding the steering wheel. Be sure to mark the position of the wheel on the steering column so you can reinstall it correctly.
3. Remove the Trim Surrounding the Gauge Cluster
- Turn the plastic screws of the knee cover so by a quarter of a turn so that the slit is aligned vertically. There are three plastic screws in total.
- Disconnect all cables and remove the knee cover trim. (optional)
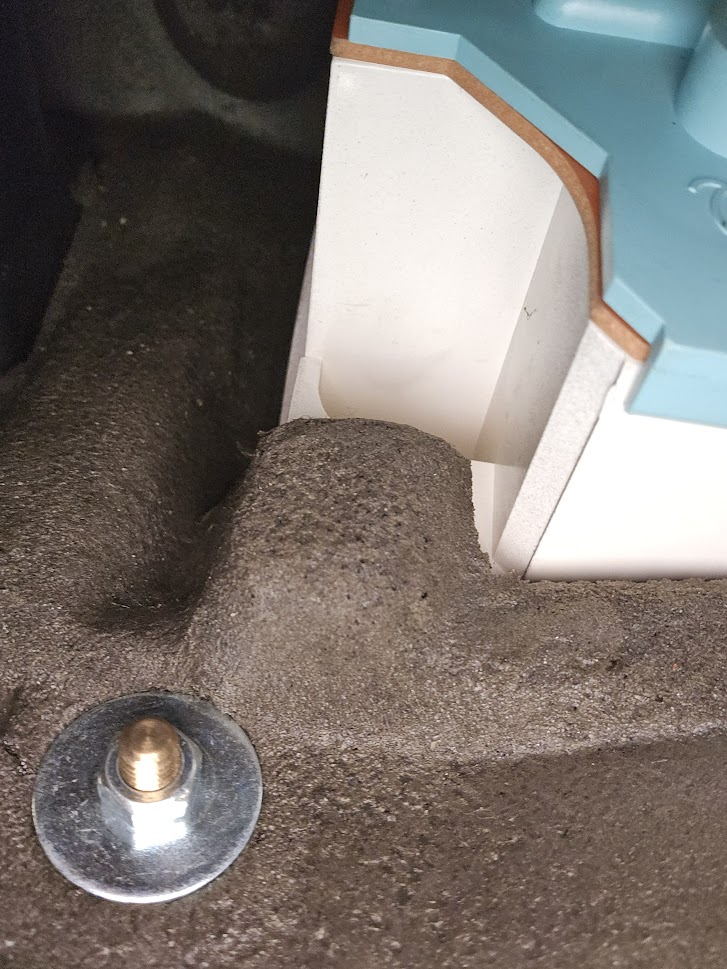
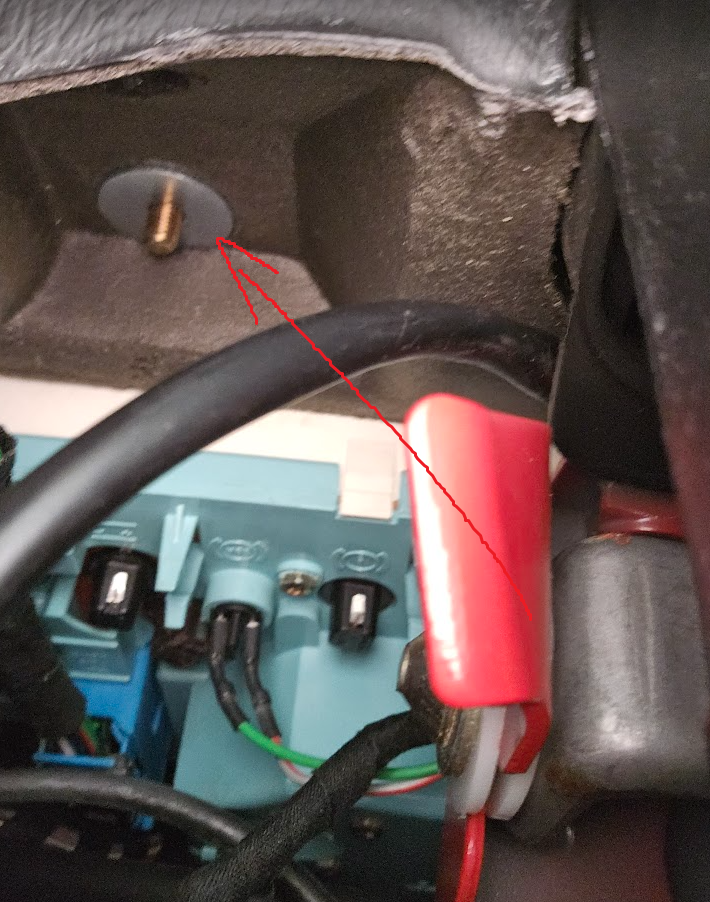
- Reach behind the trim next to the steering column and unscrew the two thumbscrews (one on each side).
- Carefully pry the trim above the steering column out.
- Using a Phillips screwdriver, locate the screws that hold the plastic trim in place. These screws are usually found on the top side of the dashboard, around the cluster area.
- Carefully pry the trim out, using plastic trim removal tools if necessary. Be gentle to avoid cracking the trim, which can become brittle over time.
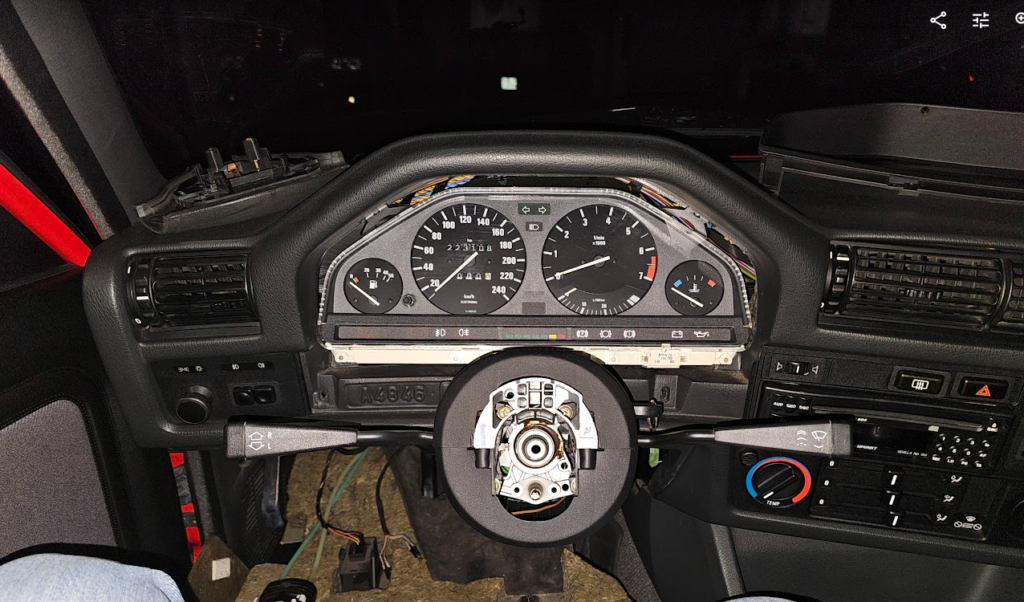
4. Unscrew the Gauge Cluster
- With the trim removed, you’ll have access to the screws securing the gauge cluster itself. There are two screws at the top of the cluster.
- Remove the screws and gently pull the gauge cluster forward, turning it facing down.
5. Disconnect the Electrical Connectors
- As you pull the gauge cluster forward, you’ll notice several electrical connectors attached to the back. These connectors supply power to the gauges and lights.
- Carefully unplug each connector. They may be tight, so take your time to avoid breaking the plastic clips.
6. Locate the Bulbs
- With the cluster removed, turn it around and inspect the back. The bulbs are housed in small twist-lock holders.
- Identify the burnt-out or dim bulbs. Depending on your model, the E30 cluster may have around 3-4 main illumination bulbs.
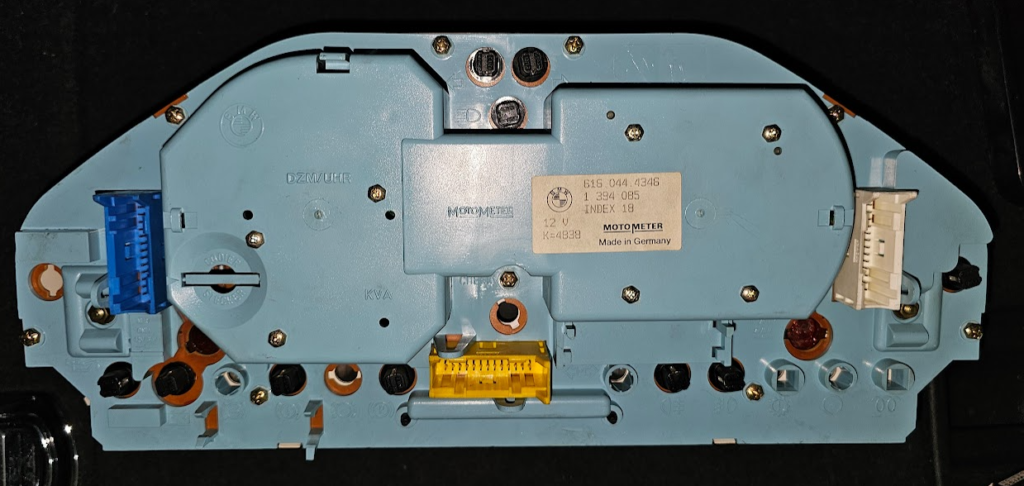
7. Remove and Replace the Bulbs
- To remove the bulbs, simply twist the bulb holders counterclockwise and pull them out.
- For the E30 318is, only use 3W bulbs as 5W bulbs will get too hot and melt the plastic housing and potentially even blow the bulb.
- Replace the old bulbs with new ones. If you’re upgrading to LED bulbs, make sure they are compatible with the cluster. LED bulbs will provide brighter light and have a longer lifespan.
8. Reinstall the Gauge Cluster
- Once all the bulbs are replaced, plug the electrical connectors back into the gauge cluster.
- Carefully position the cluster back into the dash and secure it with the screws you removed earlier.
9. Reattach the Trim and Steering Wheel
- After securing the gauge cluster, reinstall the plastic trim.
- If you removed the steering wheel, now is the time to reinstall it. Align the wheel using the marks you made earlier and tighten the center bolt.
10. Reconnect the Battery and Test
- Reconnect the battery and turn on the car’s headlights to test the gauge cluster illumination.
- If everything lights up properly, you’re done!
Tips for Upgrading to LED Bulbs
Many E30 owners opt to upgrade their gauge cluster bulbs to LEDs for improved visibility and longevity. Here are a few things to keep in mind when considering this upgrade:
- Brightness and Color: LED bulbs come in various brightness levels and colors. Choose a brightness that isn’t too harsh for nighttime driving. Stick to white or slightly warm colors to maintain the classic look of the E30 interior.
- Polarity: LED bulbs have polarity, meaning they only work when installed in the correct direction. If a bulb doesn’t light up, try rotating it 180 degrees and reinstalling.
Summary
Changing the light bulbs in the gauge cluster of your BMW E30 318is is a simple yet essential maintenance task that can greatly enhance your driving experience. With just a few tools and replacement bulbs, you can restore the cluster’s brightness and ensure that you always have clear visibility of your instrument panel, especially during night drives.
Taking the time to replace these bulbs also offers an opportunity to inspect and clean other components behind the dash, ensuring your E30 continues to run smoothly and maintain its timeless appeal. Whether you’re keeping things stock or upgrading to LED lights, this minor job can have a big impact on your driving comfort and safety.